Apptron Demo: CSS Themed Windows
In this demo I show an experimental feature of Apptron that lets you customize the window frame using HTML and CSS. This allows us to create re-usable themes. Apptron even comes with a few builtin.
In this demo I show an experimental feature of Apptron that lets you customize the window frame using HTML and CSS. This allows us to create re-usable themes. Apptron even comes with a few builtin.
In this week’s demo I built a background application using HTML and Apptron. It may seem weird to involve a webview at all for a background app, which is why this was not a use case I had planned, but I was pleasantly surprised to discover how this turned out.
In this demo I show off the rest of the Apptron CLI, which exposes most of the cross-platform APIs as commands. These commands make great shell scriptable utilities, and you can see how they’ve been designed to facilitate this. By the end, we’ll have created an app indicator (systray) icon and menu that’s created and driven by a shell script.
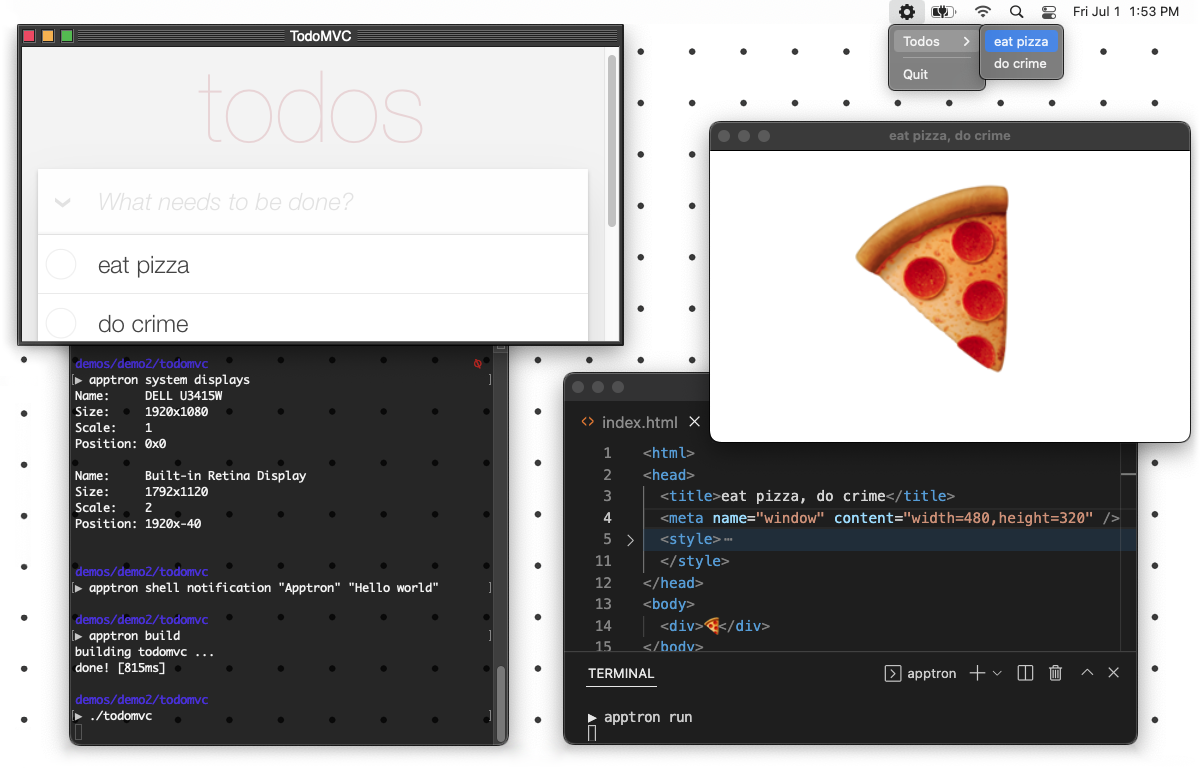
In this demo I use the Apptron build command to create an executable from a single HTML file. No setup, no configuration. If you want to change how the window looks, you can add a meta tag to your HTML file. It’s not only simple, it’s fast.
In this demo, I use the Apptron API from Go to build a simple birthday card application defined by HTML and CSS. I also explore the architectural approach of Apptron compared to directly working with platform native APIs.
To expand on the demo, in this post I’ll discuss some of the motivation behind this project. There are a few reasons why I made Apptron.
I’m happy to announce the first major building block of the Tractor System: Apptron.
Apptron is a software primitive that lets you drive native platform APIs using the technologies you’re already familiar with, enabling cross-platform webview apps and more.
Video transcript:
Creating software is too complicated. Our options are overwhelming, our tooling is too bloated, and things rarely ever “just work”.